Friday, April 8, 2016

Demo - Part 2

If you recall, from Demo - Part 1, we were originally going to keep the existing ceiling over the kitchen, but then we decided to vault the rest of the kitchen ceiling. What the heck, right? This was going to be more work and cost, but it seemed like the right thing to do.

I took a day off from work and started pulling down the drywall from the kitchen ceiling. I had to do this a little more carefully than when Al and I did it in the living and dining rooms because, as you can see, we still had our old base cabinets installed. Rather than smashing them off the walls like you see the people do on television, I figured I would try to sell them on Craigslist. I didn't end up getting any bites for the whole set, so we ended up donating them to a local charity for a tax write-off. They were still in good shape, you know? I would have hated to smash them up and throw them in the dumpster.


Starting removal of the kitchen ceiling.


Wall cabinets removed and stored in the dining room.


Look at that mess of wires!


The only remaining ceiling drywall was the boxed-in skylight.


So much for the boxed-in skylight!


Lots of joists and strapping to be removed.


Joists, strapping, and skylight framing removed from over the kitchen.
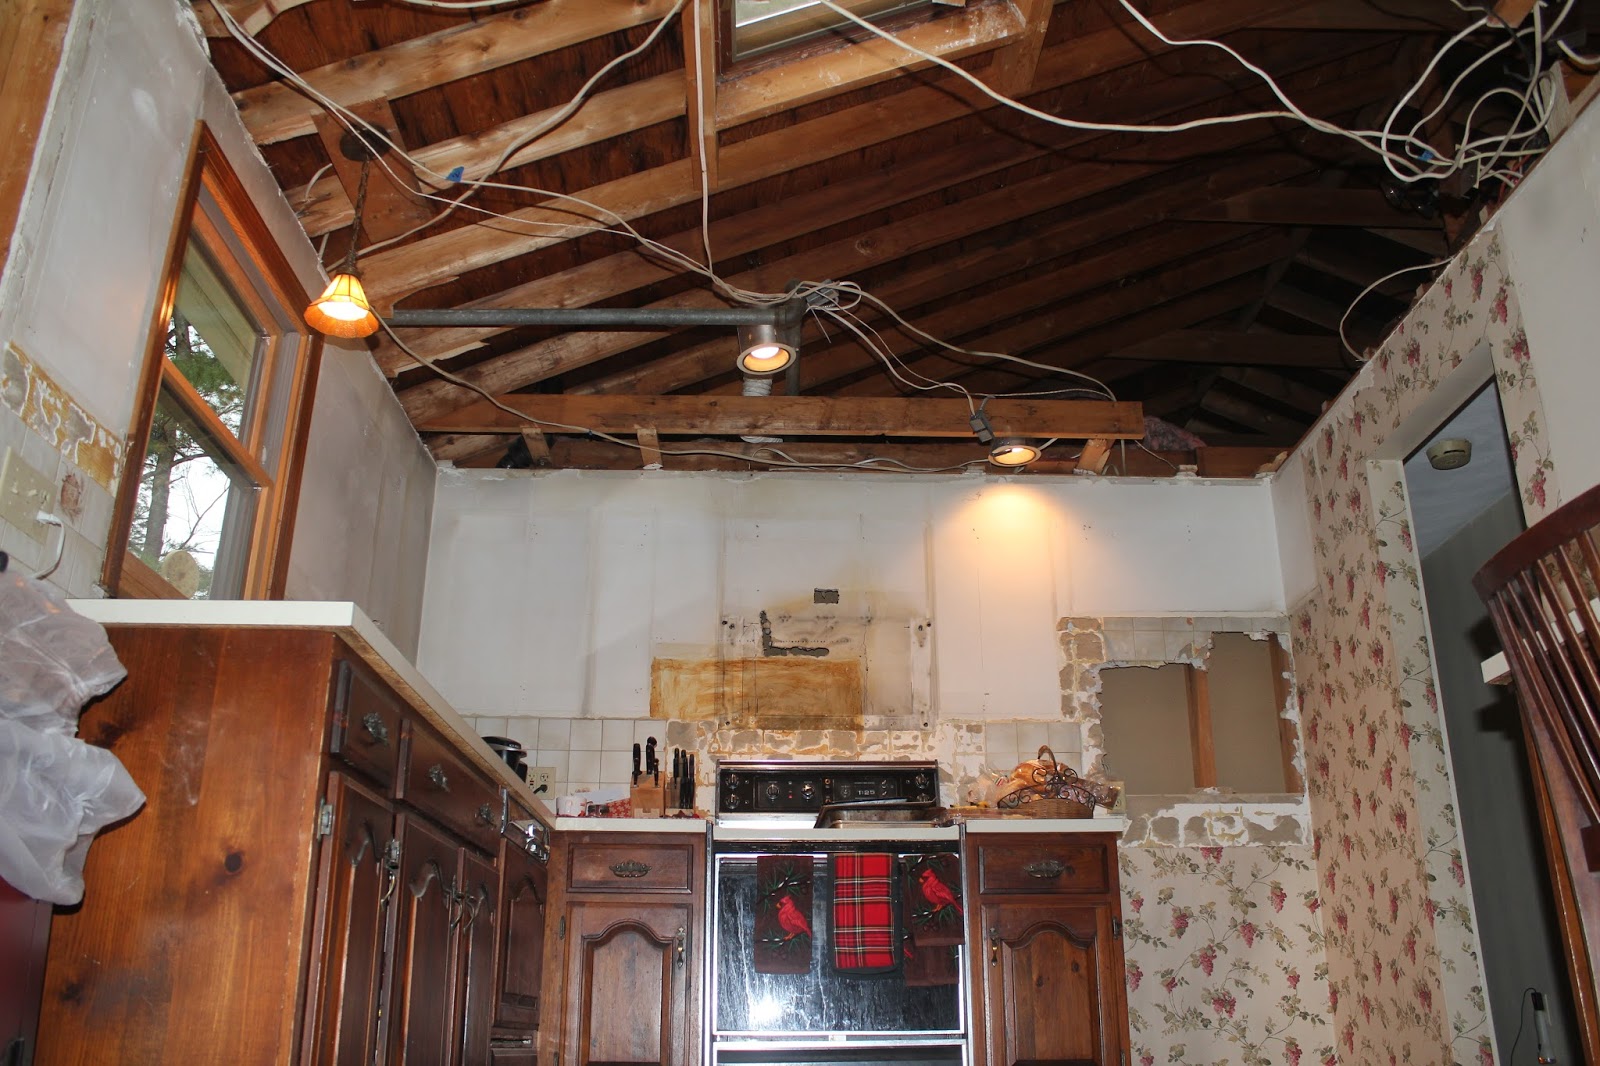

The joists did a good job of keeping that wiring up.


A better view of the laminated ridge beam.


What a mess, huh?


Another view (cabinets have been picked up).


In case you forgot the time of year we started the renovation, it was in the fall, so we had to live with the fact that Christmas was going to be a little different this year. In fact, it was the first year since we had been together that we did not have a real Christmas tree in the living room. Instead, Maura spent some extra time decorating in the basement. I got a good Black Friday deal on a pre-lit artificial Christmas tree at Lowe's.


The stockings were hung by the bar with care...


 Christmas Morning 2015


Monday, April 4, 2016

Get Into the Groove

I have to credit House*Tweaking again for helping us to decide to do a tongue and groove ceiling. Since putting up 1"x6" pieces of wood sounded easier than putting up 4'x8' sheets of drywall, I figured that I could install it myself. (We'll see later because at the time of writing this, I still haven't put it up.)


White Tongue and Groove Vaulted Ceiling from House*Tweaking


We liked the idea of having a white ceiling since our hardwood floor was going to be pretty busy. I was worried about bleed-through staining of the knots if we used wood, so I looked into alternatives on-line. I stumbled upon ready-to-install, Dura-Groove 1x6 interior painted MDF tongue and groove paneling at Michigan PreStainMedium-density fiberboard (MDF) is an engineered wood product made by breaking down hardwood or softwood residuals into wood fibers, often in a defibrator, combining it with wax and a resin binder, and forming panels by applying high temperature and pressure. MDF is generally denser than plywood.

I ended up ordering 1,472 lineal feet of the product, which came to $2,311.64. The price included a $295 shipping charge. The nice part is that it is pre-painted, so we won't have to worry about painting it, except for minor touch-ups, perhaps, after we install it.

I took a day off from work so that I could be there when the material was delivered. The UPS driver pulled up in front of my house and opened the back of his truck. The MDF was stacked up on a 16-foot palette. I asked him what the plan was for unloading it, and he said that he would cut the straps from the load and that I would have to unload it, piece-by-piece. Ugh. I want to say that it was about 1,700 pounds of material, and I had to remove each piece from the truck and lay it in my driveway. He told me that I had to take the palette, too. Great.

MDF unloaded in my driveway, along with the 16-foot palette and plastic wrap.


Can't leave it in the driveway. Better make room in the garage.


Stacked neatly in the garage on the same cinder blocks that I used in the attic.


Time to cut up the palette.


Anyone need any wood?

Sunday, March 20, 2016

Demo - Part 1

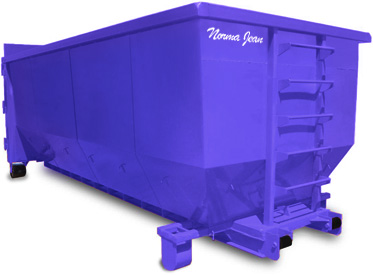
The quote that we got to do the renovation included $2,500 for a dumpster and demolition. Why would we want to pay someone to have all the fun? Joe, our cabinet guy, recommended Dirty Girl Disposal for the dumpster rental. Dirty Girl is a woman-owned and operated waste disposal company. 


Dirty Girl dumpster


Our purple dumpster was named Athena and was not quite as pristine looking as the one pictured. Athena had apparently been around the block a few times, but she was a welcomed guest in our driveway, and we made good use of her during our demolition.


First cabinets removed.


Maura is great at stripping (wallpaper).


 Now, the serious stuff begins.


My good friend, Al, helped me tear down the drywall from the ceiling and wall and load it into the dumpster. Thank you, Al!


Living room ceiling down.


And the walls come tumblin' down.


The hidden doorway between the dining area and living room.


This was always a solid wall since the house was built. I had heard that we could have had an opening between the living room and dining area, but something that small just wouldn't have cut it.


Looking from the back porch, through the house, and out the front window.


Notice that I kept the power and cable for the kitchen TV in tact.


Paisley is still getting used to the new sliding door.


Pulling up flooring in the dining room.

I put down that plywood in the above picture back when I installed the laminate flooring so that it would come up level to the linoleum.


Pulling up the carpet and pad in the living room.


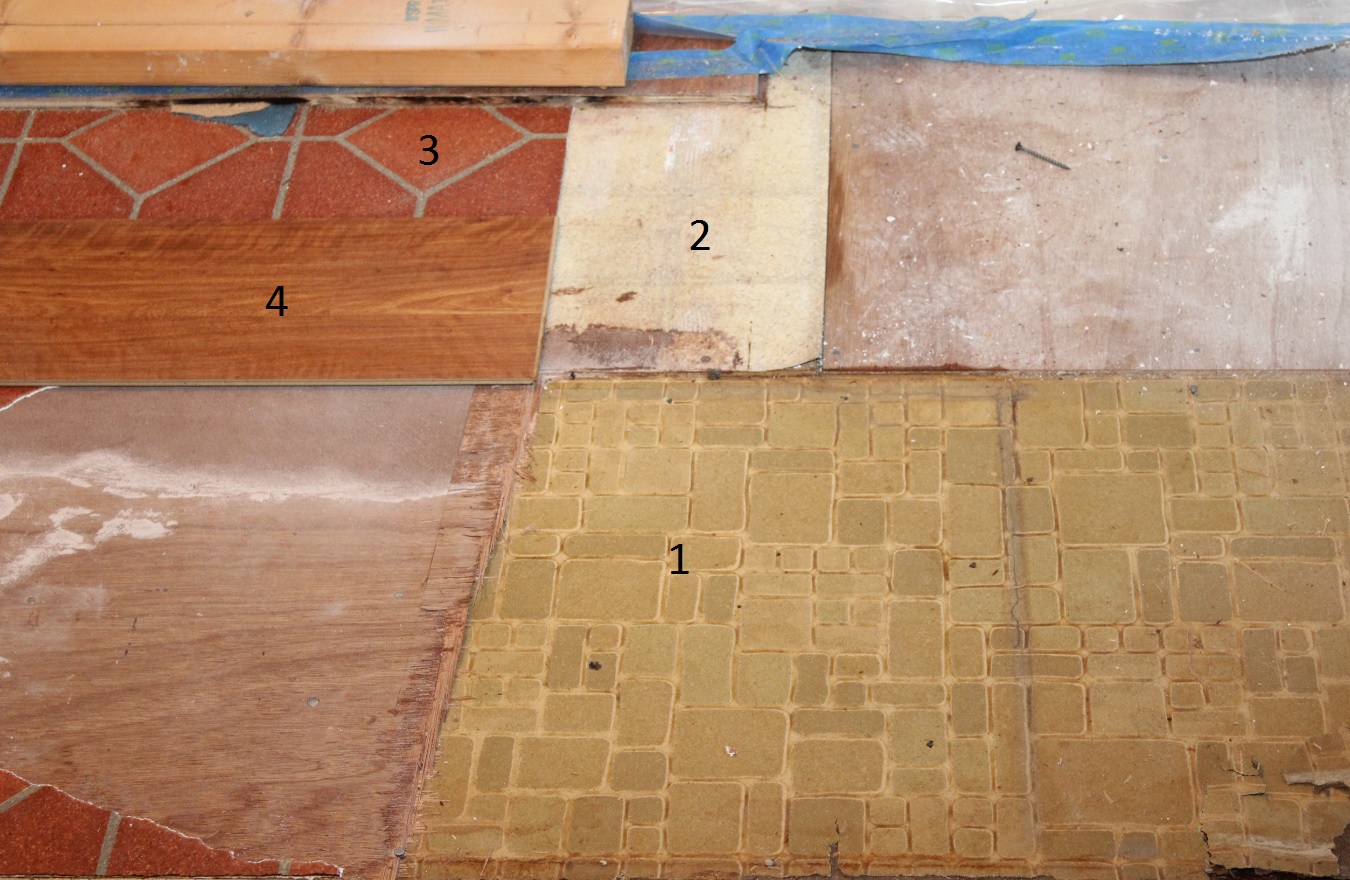
Kitchen floor through the years.
  1. original linoleum (1968)
  2. next layer of linoleum (?)
  3. another layer of linoleum (sometime between 1986 and 1998)
  4. laminate that I installed (1999-ish)


Ripping up the kitchen floor.


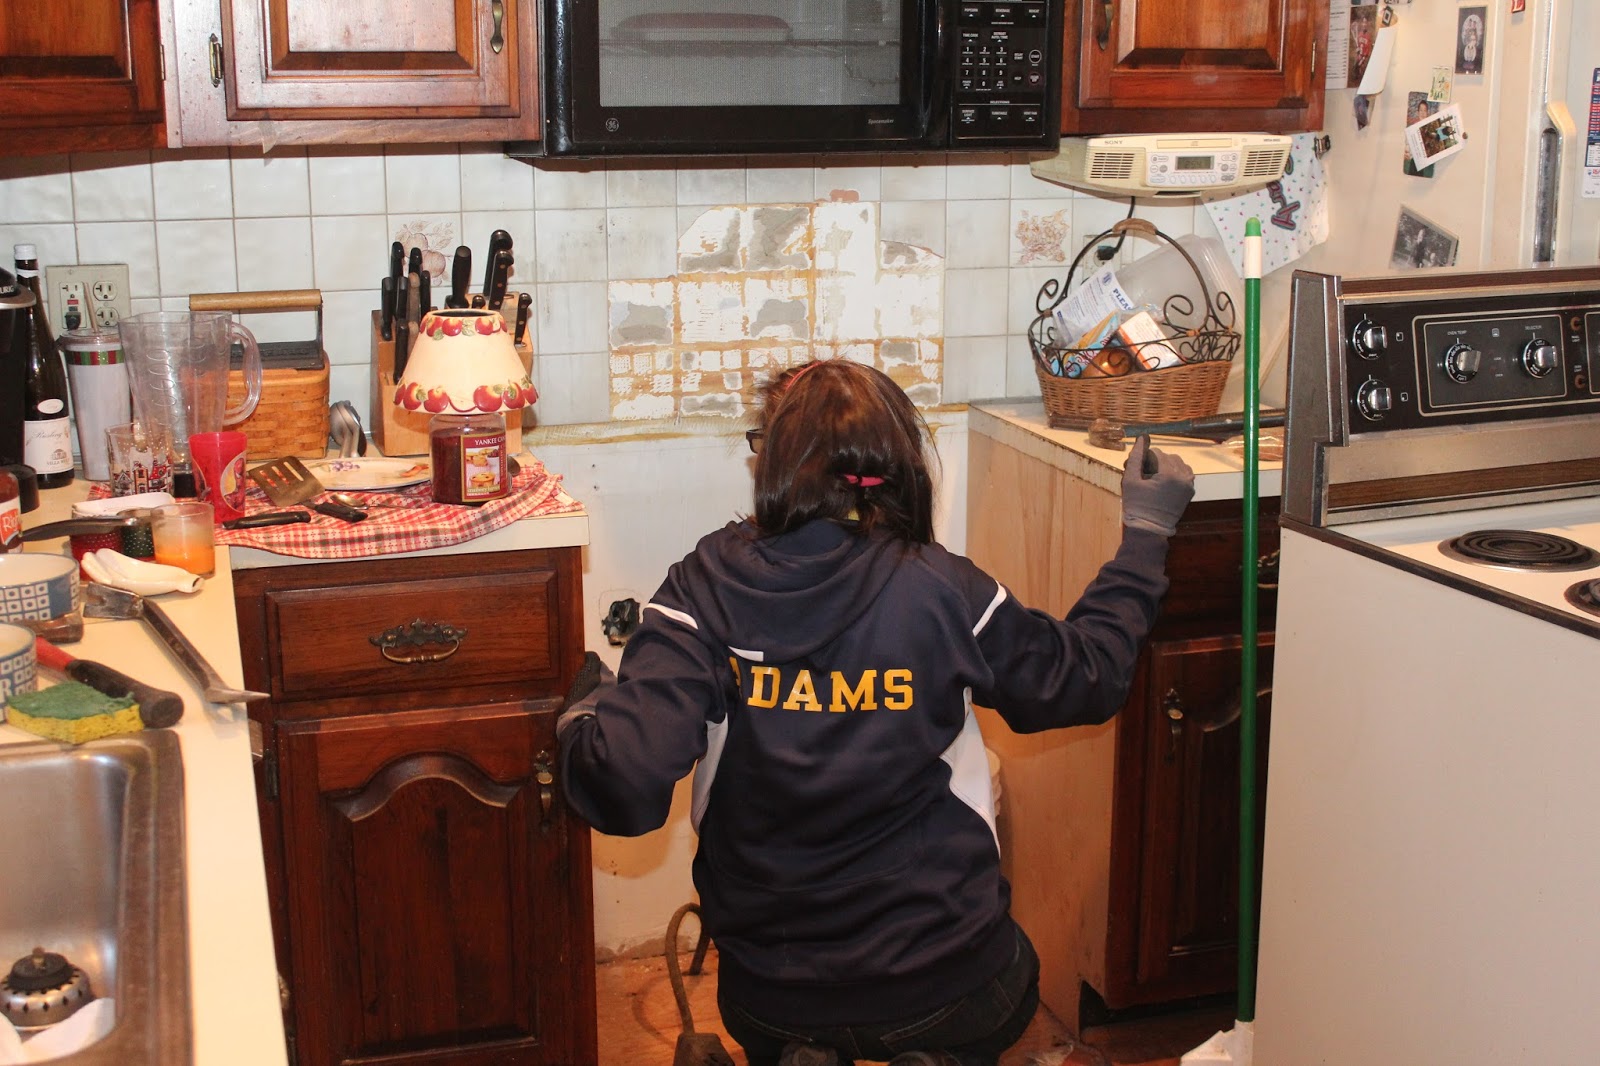
 Maura removing the old backsplash tile.


 And the dining room ceiling is down!


Little kitchen in the bubble.


If you recall, we originally weren't going to vault the ceiling, but then we decided to. First, we were just going to vault the ceiling in the living room. Then I thought it would make sense to do the same thing, straight across, so that the dining area and living room would be one big room. We were planning to keep the kitchen ceiling the way it was.

Shawn, a coworker who lent me his reciprocating saw to help with the demo (Thanks, Shawn!) said that I would regret it if I didn't continue the vault into the kitchen. The more I thought about it, the more I thought he was right. More money and more work, but what the heck, right? Go big or go home! Maura didn't need any convincing on this, by the way. Stay tuned for more destruction in Demo - Part 2!

Tuesday, March 15, 2016

Installing the Beam

Here's what our attic looked like before.


As you can see, we weren't using it for much. The access point to the attic was an opening cut through the plywood in the garage. Not that convenient, but better than the small panel that is in the closet of our bedroom.

In order to get the 18-foot LVL beam into the attic from the garage, we had to open the side window and slide each piece of the beam through it and up into the attic. Maura helped me get it up there.

Yeah, that beam's pretty long.


Beam moved up and truss cross-members removed.


Two pieces of beam nailed together.

Did I mention that I convinced Maura to let me try installing the beam, myself? I figured that if I couldn't do it, I would have to hire somebody. She probably figured that's what I would end up doing. Now, I just had to figure out how I was going to get that monster beam lifted up into place and installed plumb and level all by myself. It's not a lot of fun working in a cold, dusty, attic either.

My plan involved some of the biggest screw eyes I could find, a couple of ratchet straps, scrap pieces of wood, eight cinder blocks, two jack posts, and a bunch of determination. I screwed the a couple of screw eyes into opposite sides of the existing ridge beam above the LVL beam. I wrapped the ratchet straps around each end of the beam and hooked them into the screw  eyes. This was to steady the beam while I carefully lifted one end enough to slide some wood underneath it. Once I did that, I tightened the ratchet strap and repeated the process at the other end.

Ratchet straps attached with scrap wood under each end of the beam.


I repeated the above steps, lifting a little, ratcheting a little, and slipping more pieces of wood under the beam. This was a little tedious, and involved a lot of crawling back and forth. I had to check to make sure that this bad boy was safely supported throughout the process. Next came the cinder blocks.


One cinder block laid horizontally at each end.


One cinder block laid vertically at each end.


Stacking cinder blocks.


Stacking cinder blocks higher.


Here's where the jack posts come in.


Back to the better camera.


Once I got the jack posts up, I was able to crank them up so that the beam was solidly supported. That's when I removed the ratchet straps. Then it was time to install the permanent supports at both ends of the beam.

Cutout in living room wall and ceiling showing the post supporting the LVL beam.


Not-so-great shot of the post over the hallway holding up the other end.


I must admit, I was feeling pretty good about getting that beam installed by myself. I figured that if I could do that, the rest of the reno shouldn't be that bad, right?