Saturday, August 27, 2016

Installing the Cabinets

If you recall, we donated our old cabinets to Habitat for Humanity, and they picked them up a couple of days before Christmas. So we had been without kitchen cabinets for over three months! With the kitchen walls plastered, we had to paint them so that we could finally take delivery of our cabinets.


Here's the color paint we decided on for the kitchen, dining room, and living room.


Paisley doesn't know what to think about the cabinet delivery.


That's a lot of boxes!


Did I mention that the appliances arrived shortly after the cabinets?

We originally had a deeper refrigerator, but Julie and Joe both recommended that we exchange it for a counter-depth refrigerator so that it wouldn't stick out too much past the counters.


That's not going to work! Guess we'll move the switches to the other side of the wall.


Going to have to cut the cabinet so that the microwave drawer will fit!


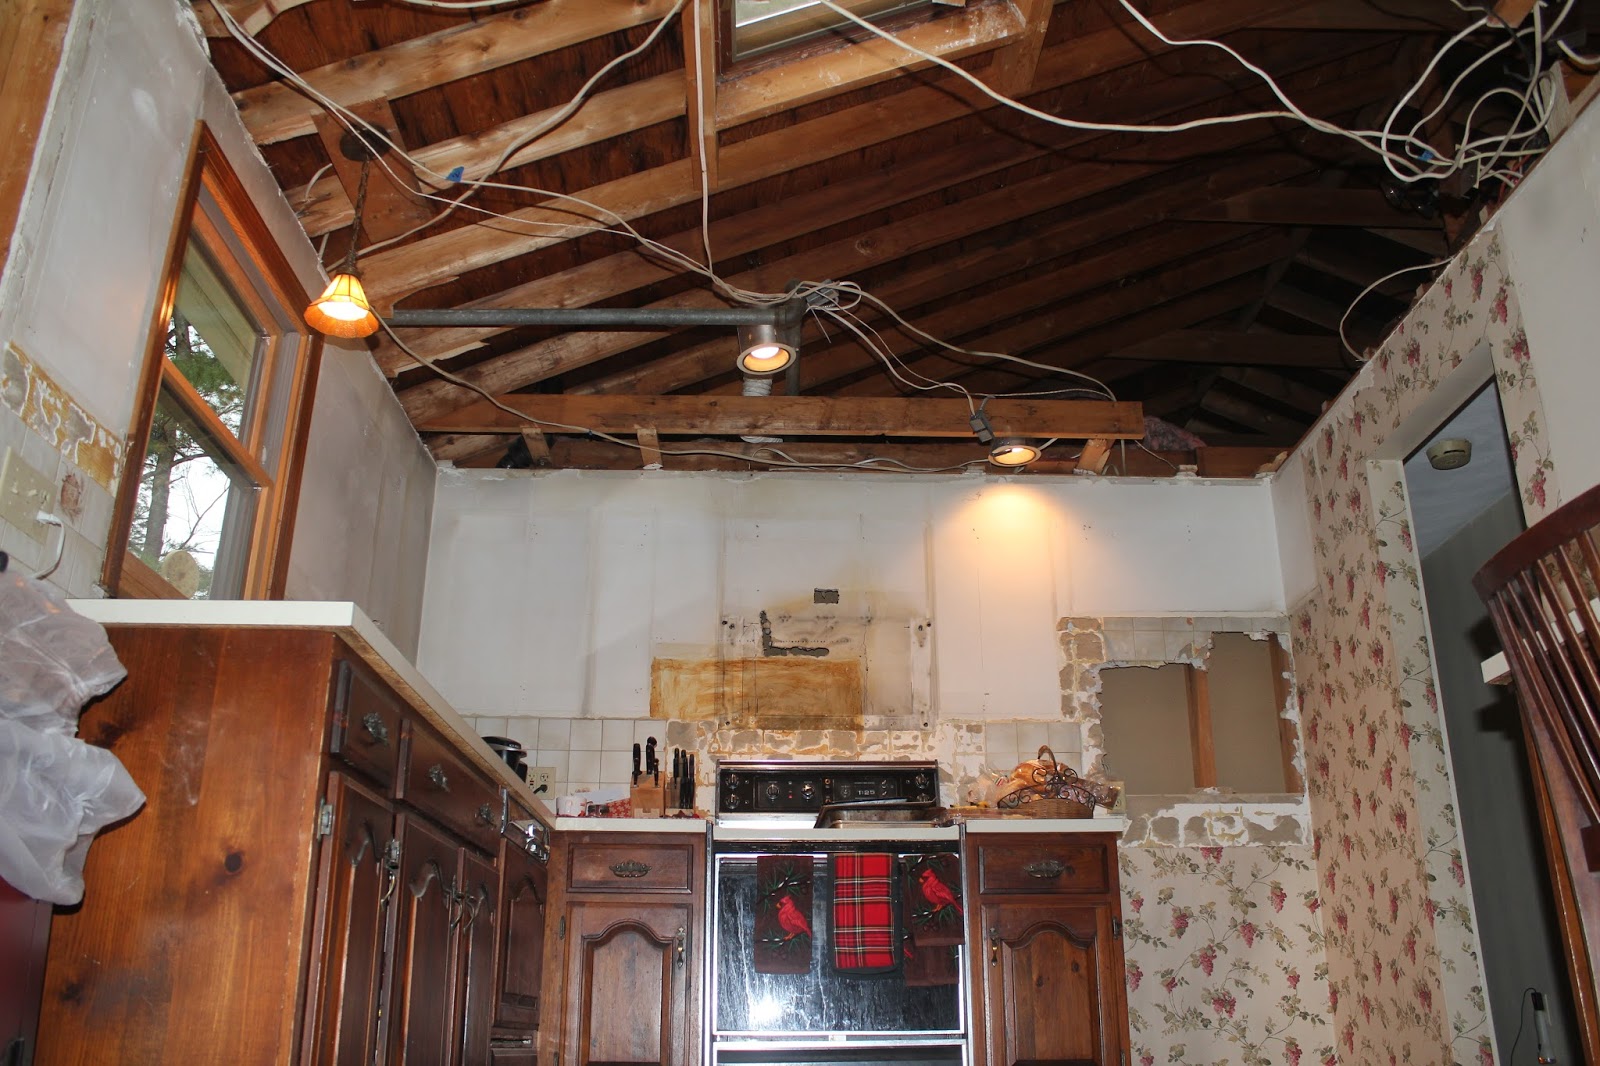
I had to install a couple of strips of the tongue & groove ceiling above the kitchen window so that I could hang the cabinets on that wall.


Yes, the television above the refrigerator is temporary.


The microwave fits in the cabinet after trimming a little off the left and right sides.


The new gas range plugged in temporarily since its dedicated outlet wasn't wired yet.

We saved a bunch of money again since I installed the cabinets myself. It's really not that difficult, as long as you can use a level, tape measure, drill, and screw gun. Empty cabinets are pretty light. It's not even that bad hanging the upper cabinets alone because of the temporary boards that you tack to the wall to rest the cabinet on while screwing them in. Hang the upper cabinets before installing the base cabinets. The wires sticking out under the cabinets will be for hard-wired under-cabinet lighting, which will all be controlled with a single switch.

These pictures take us through the very beginning of May. Note that we finally had to remove the old sink so that we could install the base cabinets in preparation for the template for the counters. Stay tuned for the next update!

Dry-walling the Kitchen

In my last blog post, I said I was overdue, but it's been over three months (May) since I've updated this blog. And the pictures from that post were three months prior to that (February)! Fear not--there has been a lot of work going on at the house! Since I have some catching up to do, this post will contain pictures from as far back as March. Then I'll have to do some more posts to get caught up.


Had to open up some of the old drywall to run wiring for the under-cabinet lights and range hood.


How about that spice rack?


Color samples taped to the kitchen wall.


So much work left to do!


Back to dry-walling--old and new.


Ready for the plasterers!

I hung the drywall myself, which wasn't bad. The 4'x8' sheets just fit, width-wise, in the back of the Durango and only hung out a few inches, so I just had to tie down the tailgate. After watching some YouTube videos on plastering, I decided that it would be worth hiring professionals. Our kitchen designer, Joe Ricardi, had told us that he would send his plastering crew if we wanted, and he gave us a great deal. Well worth it! Camille and his assistant came out and plastered the kitchen in half a day. They did a great job!


Glad we decided to hire professional plasterers!


Plastering in progress.


Kitchen plastered!


Plaster dried.


Getting there!

Stay tuned. The next post will be coming soon!

Sunday, May 15, 2016

What Do You Mean I Can't Pull My Own Electrical Permit?

I'm overdue for a blog post, so here's what went on after the demolition. I needed to build up the walls above the original ceiling up to the rafters. This was happening in the middle of winter, and I had to get things ready so that my brother-in-law could do the wiring. I had heard that the homeowner could pull the electrical permit in some instances, but it didn't turn out to be the case in our town. Looking back on it, I'm very happy that we had a licensed electrician (and family member) do the wiring. Andy is very thorough and does great work!

Before Andy arrived, I first concentrated on the upper walls of the kitchen, mostly because that was the most work, plus it isn't much fun living in a house with a functional kitchen. Okay, our kitchen was technically functional. After we got rid of the cabinets, my wonderful neighbor (retired plumber) hooked my sink back up for me. I supported it with some 2x4 and 2x6 pieces, and that temporary sink served us well from a few days before Christmas until the end of April. It was a good thing that it was just Maura, me, and our dog, Paisley, living at home during the bulk of this renovation. It helped that Gabe and Carly were away at school. Keep in mind that the pictures in this entry were taken in February. Thank goodness it wasn't a bad winter!


First part of the upper-wall studded.


Old bank of switches (and the previous owner was an electrician!).


New bank of switches (much nicer job done by Andy).


More of the new wiring (and our old sink temporarily hooked up).


New LED recessed lights!


These 10-watt lights are bright!


We'll need to install dimmers.


Still hadn't taken down the living room ceiling joists at this point.


The scaffolding was a great purchase!


Getting ready to close up the old kitchen entry.


Friday, April 8, 2016

Demo - Part 2

If you recall, from Demo - Part 1, we were originally going to keep the existing ceiling over the kitchen, but then we decided to vault the rest of the kitchen ceiling. What the heck, right? This was going to be more work and cost, but it seemed like the right thing to do.

I took a day off from work and started pulling down the drywall from the kitchen ceiling. I had to do this a little more carefully than when Al and I did it in the living and dining rooms because, as you can see, we still had our old base cabinets installed. Rather than smashing them off the walls like you see the people do on television, I figured I would try to sell them on Craigslist. I didn't end up getting any bites for the whole set, so we ended up donating them to a local charity for a tax write-off. They were still in good shape, you know? I would have hated to smash them up and throw them in the dumpster.


Starting removal of the kitchen ceiling.


Wall cabinets removed and stored in the dining room.


Look at that mess of wires!


The only remaining ceiling drywall was the boxed-in skylight.


So much for the boxed-in skylight!


Lots of joists and strapping to be removed.


Joists, strapping, and skylight framing removed from over the kitchen.


The joists did a good job of keeping that wiring up.


A better view of the laminated ridge beam.


What a mess, huh?


Another view (cabinets have been picked up).


In case you forgot the time of year we started the renovation, it was in the fall, so we had to live with the fact that Christmas was going to be a little different this year. In fact, it was the first year since we had been together that we did not have a real Christmas tree in the living room. Instead, Maura spent some extra time decorating in the basement. I got a good Black Friday deal on a pre-lit artificial Christmas tree at Lowe's.


The stockings were hung by the bar with care...


 Christmas Morning 2015


Monday, April 4, 2016

Get Into the Groove

I have to credit House*Tweaking again for helping us to decide to do a tongue and groove ceiling. Since putting up 1"x6" pieces of wood sounded easier than putting up 4'x8' sheets of drywall, I figured that I could install it myself. (We'll see later because at the time of writing this, I still haven't put it up.)


White Tongue and Groove Vaulted Ceiling from House*Tweaking


We liked the idea of having a white ceiling since our hardwood floor was going to be pretty busy. I was worried about bleed-through staining of the knots if we used wood, so I looked into alternatives on-line. I stumbled upon ready-to-install, Dura-Groove 1x6 interior painted MDF tongue and groove paneling at Michigan PreStainMedium-density fiberboard (MDF) is an engineered wood product made by breaking down hardwood or softwood residuals into wood fibers, often in a defibrator, combining it with wax and a resin binder, and forming panels by applying high temperature and pressure. MDF is generally denser than plywood.

I ended up ordering 1,472 lineal feet of the product, which came to $2,311.64. The price included a $295 shipping charge. The nice part is that it is pre-painted, so we won't have to worry about painting it, except for minor touch-ups, perhaps, after we install it.

I took a day off from work so that I could be there when the material was delivered. The UPS driver pulled up in front of my house and opened the back of his truck. The MDF was stacked up on a 16-foot palette. I asked him what the plan was for unloading it, and he said that he would cut the straps from the load and that I would have to unload it, piece-by-piece. Ugh. I want to say that it was about 1,700 pounds of material, and I had to remove each piece from the truck and lay it in my driveway. He told me that I had to take the palette, too. Great.

MDF unloaded in my driveway, along with the 16-foot palette and plastic wrap.


Can't leave it in the driveway. Better make room in the garage.


Stacked neatly in the garage on the same cinder blocks that I used in the attic.


Time to cut up the palette.


Anyone need any wood?